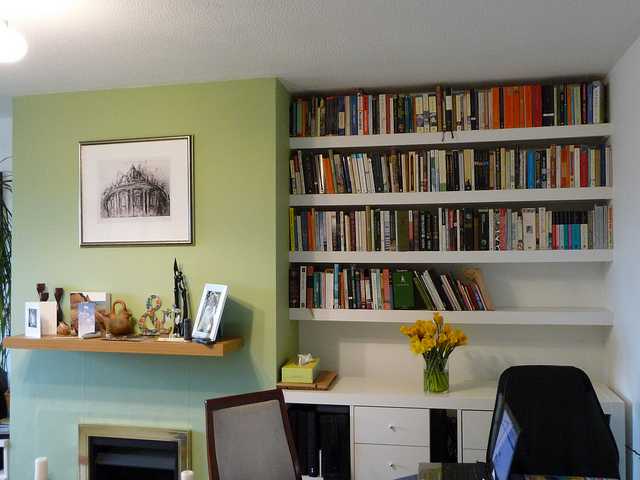
 Photo by JodyDigger
Built-in shelves take the wall as a back support. It saves you time and money of constructing a book shelf with a back. The wall has its back, offering maximum stability. The built in shelves extend only a few inches from the wall in space.
You can be even further economical with this space saving furniture if you have a knack for DIY carpentry. It is not a very tough project either. Typically, the built in shelf should be done in a month, when you are working only on weekends.
Important things to consider
Before you start with the project, it should be useful to keep track of a few important things. First, make sure you are keeping sufficient shelf space for all books, height wise. There should be a few inches space above the books so that their corners are not harmed when you pick them off the shelves. The best approach is to evaluate your books first. Do you own special edition Big Hardcover books? Do you have a stash of magazines? Does your collection include heavy volumes of antique literature?
Next, you must make sure that the shelves are sturdy to hold the weight of books. Usually, this is not a problem unless you have set really weak joints. For complete support, you should set the shelves with nails and glue on the jointed area. Keep the instruments handy for this fantastic DIY home library project. You will need the circular saw, hammer, drill, framing square, orbital sander, nail gun, jigsaw, speed square, and table saw. Do wear your safety glasses and gloves in any DIY carpentry project you undertake.
Set up the framework
Start with finalizing the wall space that you are to use. Take accurate measurements. Cut the slabs for wall cleats. Fix them securely with construction adhesive and wall anchors. Before setting the side cleats, attach the breadth wise cleat on the ceiling. Attach the side boards with this top slab. Set up thick sideboards, approximately the same breadth like a paperback volume. Set up the bracket supports next. Add a decorative fascia and side moldings to your book shelf.
For the fascia, you would have to attach an extra cleat at the top, about three fourth of the fascia breadth. Prepare the shelf brackets when you are done with setting the sideboards and the top. A very useful tip here is to cut the shelves about one inch long than you need. It saves you from a lot of fuss when you have to attach the moldings later. Once you have set the planks exactly as you want, you can always trim the extra inch for the perfect fit. Sand and paint the shelves for the final touch. When the paint has dried, let your library be! Take a pic, post it to Pinterest maybe!
Consider adding a secret panel at the base of your shelf. When the side brackets are thick as well, people will rarely assume that the thick base is actually a secret compartment. Make it discreet by attaching a magnetic latch on the base panel, and a small indent at a side to push open the latch. This should be the perfect place to keep your most treasured books, the ones you do not want to show to others.