 Photo by swpic
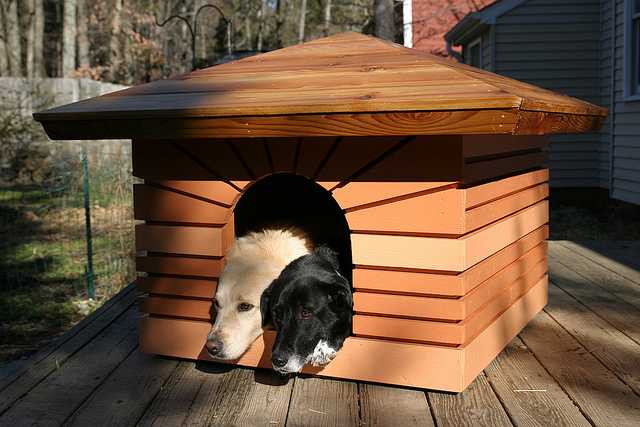
The love you show in setting up a comfortable dog house for your pooch is returned manifold by the proud resident of the house! Building a dog house is a very simple DIY project. However, one should not be careless in building it without adequate notice for complete creature comfort!
Points to remember
– The lumber should not be treated with chemicals (avoid pressure treated ones)
– The house should have good insulation from cold
– It should be rainproof
– There should not be splinters or nails jutting out anywhere.
– The dog house should be comfortably spacious for your pet to enter and relax. Always build the house customized to the grownup size of your dog. The puppy now would quickly grow into a full sized dog by a few years. Make sure that the house is accommodative at all times.
Simple instructions
Set the floor
In carpentry projects, one should always start with a good blueprint plan. You should consider setting up a spacious house with a median partition. Partitions help keep the enclosed space warmer by the body heat of your pawed buddy. Start with the floor. Use a framing square to make the basic structure by joining four different pieces.
Join them with galvanized wood screws into the holes made by the countersink drill bit. Once this rectangular frame is ready, attach a plywood sheet for the floor. Plywood is a good choice because it is tough to scratch and does not leave splinters. However, use real wood for the walls and the roof. Even a thin sheet of wood has better insulation capacity than plywood has.
Set up the walls
Set up the walls. The front wall would have the door opening. Of course, you do not add a hinged door to a doghouse typically (unless, your dog is so smart that it can open and close doors). The side walls would be rectangular according to your required dimensions. The front and back walls should represent a pentagram shape with pointed triangular tops over a rectangular base, the same size as the side walls. You will need the slanting to set the slanted roof.
Keep the door opening neither too small for the dog to enter, nor too big for hampering the insulation. Always remember that the design sizes must be according to the maximum size of your fully grown up dog. Set the walls on the floor base and attach framing supports with galvanized screws. First, set up the sides. Then, proceed with the front and back panels. Set all of them together with uniformly placed screws.
Set the roof
The roof should be slanted to prevent accumulation of water and snow. Remember that the roof should sit on angled sides, properly measured, to offer maximum insulation. Add support frames to the triangular extensions of the back and front walls. Prepare the two roof panels separately. Attach them with the support frames on the front and back walls. You will also have to nail shingles to the roof for waterproofing. When all is done, the house is ready for your canine friend.