 Photo by Douglas J O’Brien
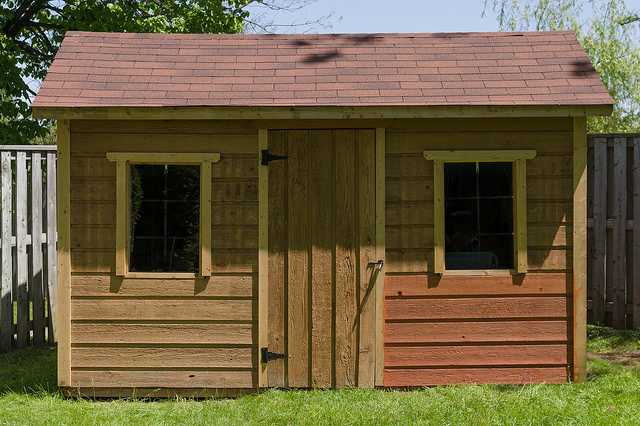
Setting up a shed is an excellent option when you want a small, basic room, anywhere. At your home, the shed can be used as a store room. Dads can take up a DIY project of constructing a real playhouse for their young star. The simple shed would be automatically transformed to a magical palace in the imagination of your kid.
However, one needs to note that it is a cumbersome lumber project, so you should plan at least three to four months if you are working only on weekends. Here you can find a very basic guideline on setting up a strong and neat shed.
Start with the floor
Like in anything else, having a strong foundation is literally important in any carpentry project with floors. Once you have demarcated the area to set up the shed, follow it with drawing a grid on the ground for the posts. Set up the posts up to a depth exceeding the frost line in your place. Add a concrete mix to the post holes for ultimate fortification. You can find sample layouts easily. The main idea is to keep the posts at a uniform distance, not too far, nor too near of each other (4-6 feet). Precast concrete posts are also available.
Once the deck piers have been set, you proceed with setting up the support beams on them. Use heavy beams but make sure they are not so heavy to crack the supporting posts. Attach the beams and posts with metal straps. Next, proceed with the all-important joists to set the skeleton of the floor. Start with rim joists for the outermost edges of support beams. Use double dipped galvanized nails or steel nails for setting the joists.
Next, you put up the lengthwise joists and add ‘blocking’ between the joists across the central support beam to prevent them from dislocation. Point to note here is that the layout must consist of an odd number of support beams placed parallel to have a proper center. Typically, 3 to 5 beams are perfect for a standard shed. When this skeletal structure has been done, nail the plywood sheets over them to complete the floor. Use H-clips besides the steel nails to make sure the sheets do not move.
Set up the walls and roof
The front and back walls are different as the front would include a door frame. The side walls should be slightly sloped to prevent water/snow jamming on the shed roof. The best approach is to construct the back wall first, then the front, and finally the side walls. Set up beams on all sides. You need to set them to the floor strongly.
Use metal straps and toenail them by driving the nail in an angular manner. When the floor and the walls are done, set up roof rafters and strengthen them by adding ‘blocking’ structures between consecutive rafts. Finally, nail plywood sheeting to complete the roof. Cover the walls with textured plywood. Add a door up front. Many sheds also have a couple of stairs to the door.